Configure AWS DNS Firewall in an AWS Account
5 min read


In today's cloud-centric world, the security and reliability of your network infrastructure are paramount. As businesses increasingly migrate their workloads to the cloud, ensuring robust protection against malicious actors and harmful domains becomes critical. Enter AWS DNS Firewall—a powerful tool designed to safeguard your Amazon Virtual Private Cloud (VPC) from DNS-based threats.
AWS DNS Firewall offers a comprehensive solution to filter and monitor DNS traffic, providing an added layer of security to your cloud environment. It enables you to block DNS queries directed at known malicious domains while permitting those to trusted domains. Its straightforward deployment model allows for easy protection of your VPCs using both managed and custom domain lists. By leveraging DNS Firewall, you can filter and control outbound DNS requests effectively. The service inspects DNS requests processed by Route 53 Resolver and enforces the actions you define, allowing or blocking requests as specified.
In this blog, we'll dive into the features and benefits of AWS DNS Firewall, explore its setup and configuration.
Step 1: To begin with, log in to your AWS Management Console using your credentials. Once logged in, navigate to the search bar at the top of the console. Type "DNS Firewall" into the search tab and then click on it.
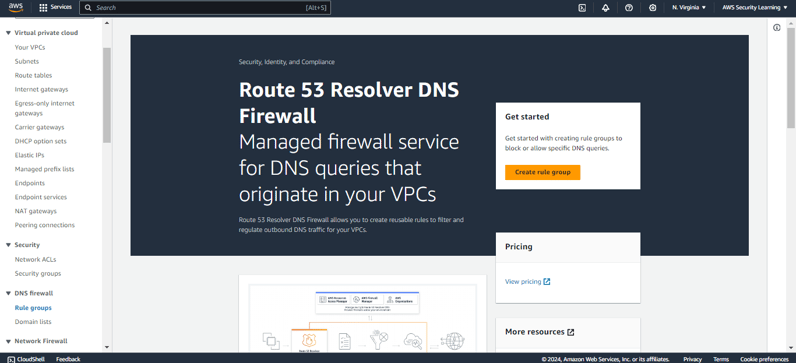

Step 2: Click on Create Rule Group and add the required Rule Group details.
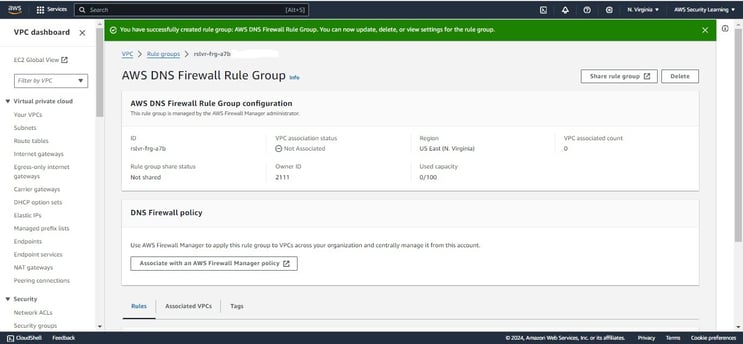

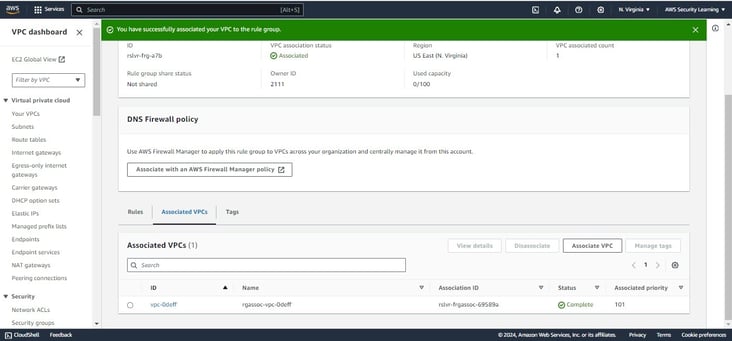
Step 3: Scroll down and click on Associated VPCs option, then Select one or more VPCs, and then choose Associate in order to associate the newly created rule group to your VPCs.

Step 4: Now navigate to “Rules” section on Rule Group page and click on Add Rule to add AWS managed domain list rules.
When you create your rule group, you attach rules and set an action and priority for the rule. You can set rule actions to Allow, Block, or Alert. When you set the action to Block, you can return the following responses:
NODATA – Returns no response.
NXDOMAIN – Returns an unknown domain response.
OVERRIDE – Returns a custom CNAME response.


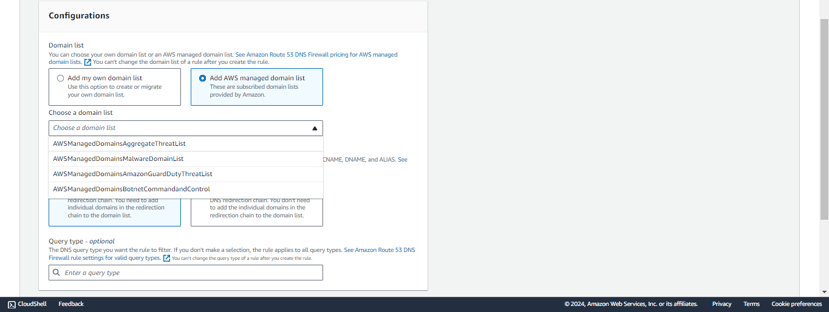

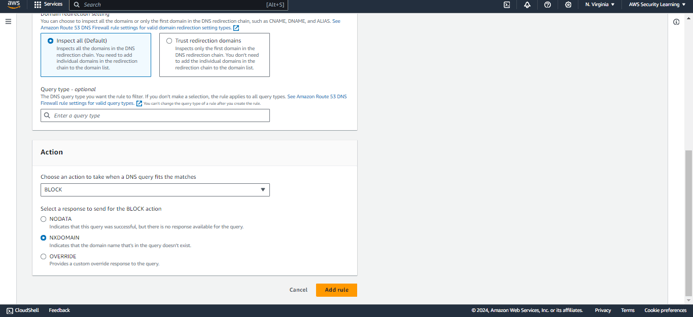

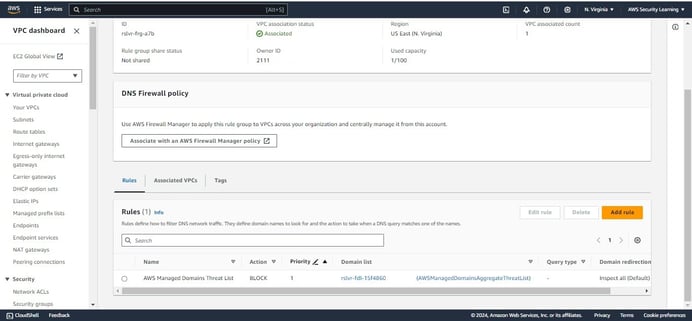

Step 6: Follow the same steps and add other AWS managed domain list rules.
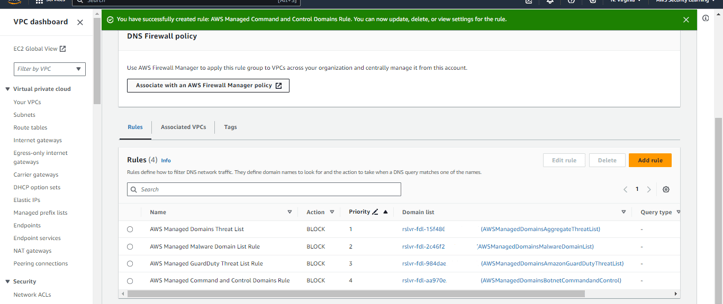

Step 7: You can set up Custom Domain List rules to specify actions for specific domains or sub-domains. Define the domains and assign ALLOW, BLOCK, or ALERT actions for precise DNS query control.
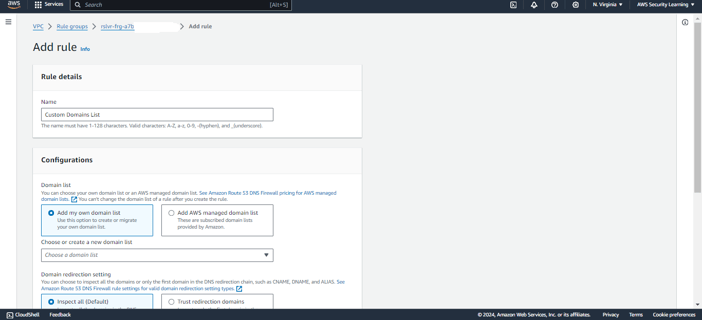

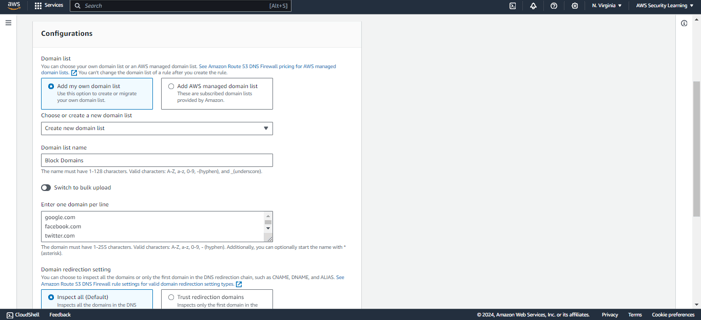

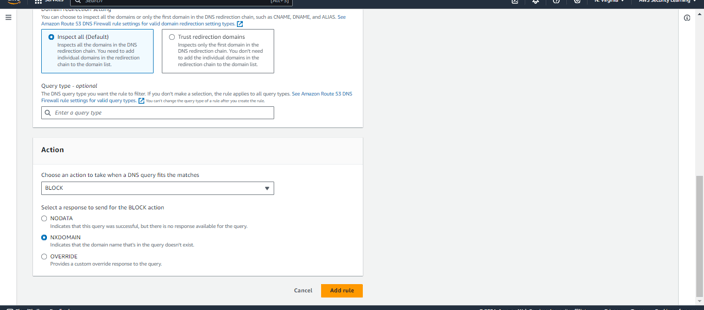

Please make sure to set the priority of each rule accordingly.
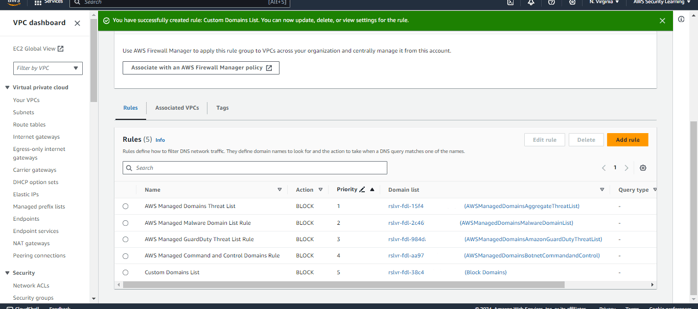

In case you want to update the “Custom Domains List” rule then navigate to Domain Lists under DNS firewall on VPC page and add or remove the domains/sub-domains.
You can create a new domain list as well with appropriate action to ALLOW, BLOCK or ALERT.
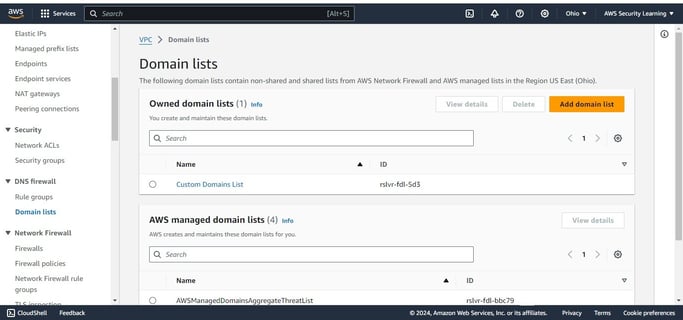

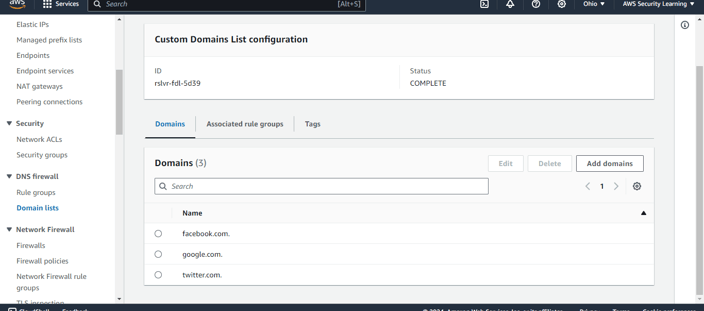

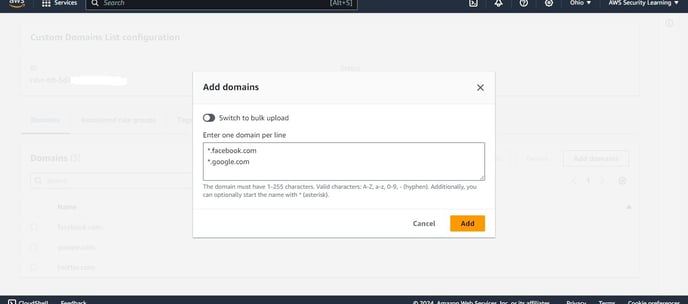

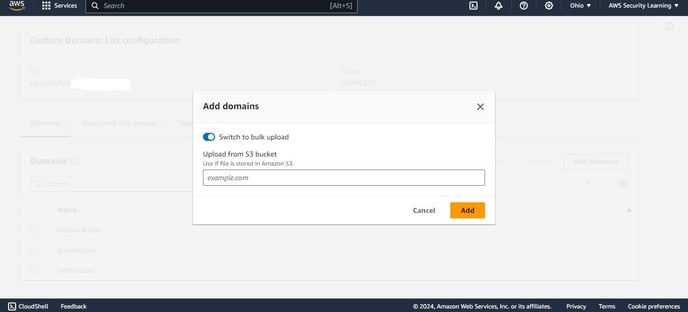
You can use S3 bucket, in case you need to add domains/sub-domains in bulk.

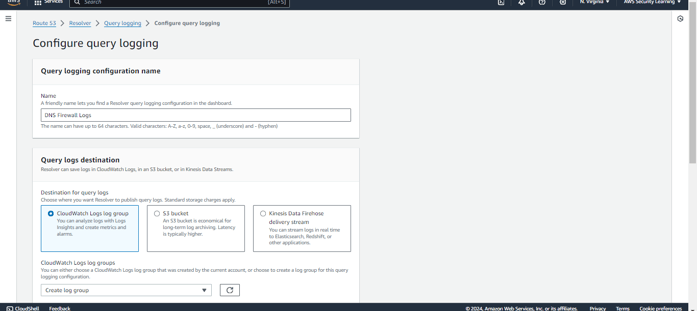
Step 8: Once you are done with the AWS DNS Firewall setup and configuration, you can go ahead and navigate to Route53 and configure Query logging to store the DNS query logs in CloudWatch, S3 or Kinesis Data Firehose delivery stream as per your requirement.
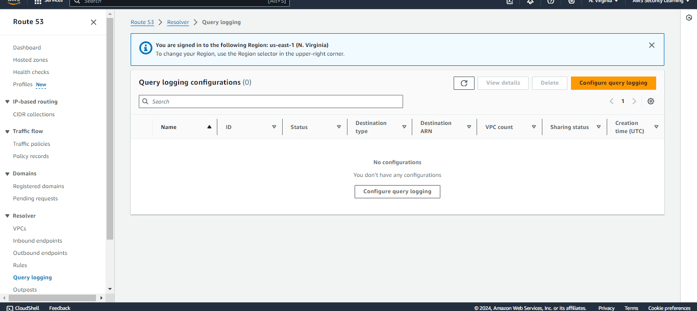

Step 9: Mention the required details for Query logging configuration and select the Query logs destination as per your requirement.

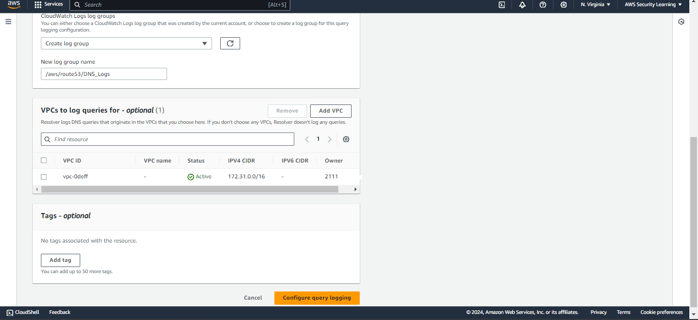
Step 10: Select and add the VPCs for which you want resolver to log DNS queries. If you don’t choose any VPCs, Resolver doesn’t log any queries.

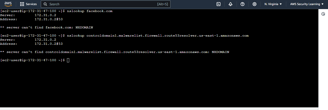
Step 11: Now, login to an EC2 instance and test if the AWS DNS firewall rules (both managed and custom rules) are working as intended or not. In the below screenshot, you can see that the AWS DNS firewall rules (both managed and custom rules) are working as intended.
Note: To test the Managed Domain lists, AWS provides a set of domains for testing the Managed Domain Lists.

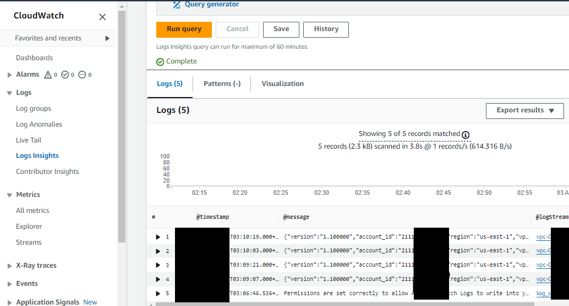
Now to check the logs, navigate to your query logs destination and check if the DNS queries are getting logged or not. If your query logs destination is CloudWatch, you can run the queries to find the DNS query logs.
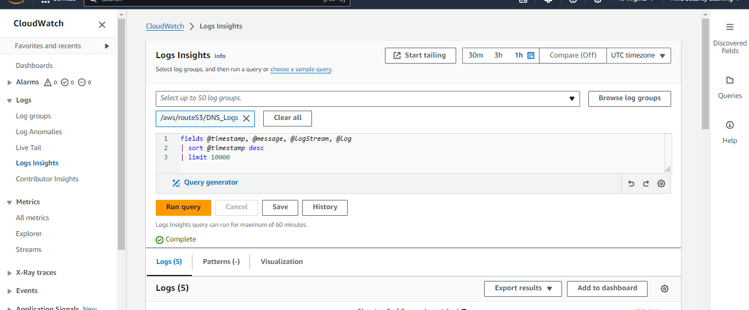

Expand the logs to find the in depth details.

Conclusion
In conclusion, AWS DNS Firewall provides a powerful and flexible solution for safeguarding your VPCs against DNS-based threats. By following the steps outlined in this guide, you can effectively configure DNS Firewall to block malicious domains, allow trusted domains, and tailor rules to meet your specific requirements. Additionally, setting up query log destinations enhances your visibility into DNS activities, enabling proactive monitoring and threat mitigation.
Disclaimer
This blog serves as a general guide to help you get started with AWS DNS Firewall. Please remember that each individual or project has unique requirements and expectations. It is crucial to thoroughly assess and customize the configurations to suit your specific environment and needs. Implementing these instructions without proper evaluation may lead to unintended consequences. Always test configurations in a non-production environment before applying them to your production systems. Use this guide as a reference, but ensure that your final setup aligns with your project’s objectives and security policies.
Happy securing!
Daily Ink Well
© 2024. All rights reserved.
